
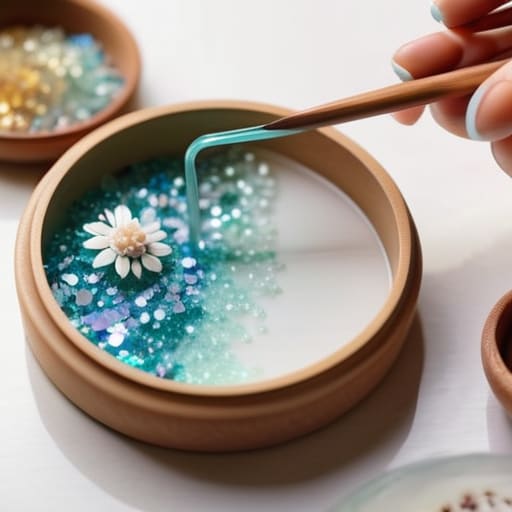
I spent three hours last weekend staring at a puddle of half-cured, cloudy sludge on my workbench, wondering why my “easy” DIY project looked more like a science experiment gone wrong than a piece of art. Most people will tell you that starting resin crafts for beginners is just about buying a colorful kit and following a pretty video, but that’s a lie. If you don’t respect the chemistry and the prep work, you aren’t crafting; you’re just making a mess that’s impossible to clean up.
I’m not here to sell you on some aesthetic lifestyle or a dozen useless trinkets you’ll find on a trending social media feed. Instead, I want to give you the actual systems for success. We’re going to skip the fluff and focus on the essential gear, safety protocols, and mixing ratios that ensure your first project actually sets clear and hard. If you want to build something that looks professional rather than amateur, let’s get to work.
Guide Overview
Tools & Supplies
- Silicone molds for shaping the resin
- Mixing cups for combining resin and hardener
- Wooden stir sticks for blending
- Heat gun or torch to remove air bubbles
- Nitrile gloves for hand protection
- Epoxy resin kit (2-part resin and hardener)
- Liquid pigments or mica powder for color
- Glitter or dried flowers for decoration
- Sandpaper for smoothing edges
Step-by-Step Instructions
- 1. First, you need to set up a workspace that isn’t going to be ruined by a single accidental spill. Forget working on your kitchen table; you need a dedicated area with a silicone mat or a heavy-duty plastic sheet. Resin is a nightmare to clean once it starts to cure, so make sure your surface is non-porous and that you have plenty of ventilation. If you aren’t working near a window or under a high-quality fan, you’re asking for a headache.
- 2. Don’t even think about touching the stuff until you have your PPE (Personal Protective Equipment) ready. I’ve seen too many people skip this because they think a “little bit of vapor” won’t hurt. Get a proper respirator with organic vapor cartridges and a pair of nitrile gloves. If you get resin on your skin, wash it off with soap and water immediately—don’t try to use solvent, or you’ll just drive the chemicals deeper into your pores.
- 3. Now, let’s talk about the actual mixing, which is where most beginners blow it. Most kits use a two-part system: resin and hardener. You have to follow the ratio on the bottle exactly. If it says 1:1 by volume, don’t guess. Use two separate graduated mixing cups and stir slowly. If you stir too fast, you’ll introduce a mountain of tiny air bubbles that will make your finished piece look like it’s filled with Swiss cheese.
- 4. Once your mixture is clear and consistent, it’s time to pour. If you’re using molds, pour in small increments rather than dumping it all in at once. This helps the resin settle without trapping air underneath your inclusions. If you see bubbles rising to the surface, take a small butane torch or a heat gun and pass it lightly over the top. You aren’t trying to melt the resin; you’re just using the heat to pop those bubbles on contact.
- 5. Patience is your biggest hurdle here. Once the pour is done, cover your piece with a cardboard box or a plastic bin to keep dust, pet hair, and debris from landing in your wet work. Let it sit in a room that is consistently warm; if your workspace is too cold, the resin might stay tacky or even fail to cure properly. Check the instructions for the specific cure time, and resist the urge to poke at it every twenty minutes.
- 6. After the initial cure, you’ll likely find that the edges of your piece aren’t as smooth as you’d like. This is where the real work begins. Use a fine-grit sandpaper (start around 400 and work your way up to 2000) to sand down any sharp bits or imperfections. If you want that professional, glass-like finish, you’ll need to do a final polishing stage with a buffing compound. It takes more time, but it’s the difference between a hobbyist project and something you’d actually be proud to display.
Essential Resin Art Supplies That Arent Just Hype
Look, you can find a thousand “starter kits” online that promise everything you need in one colorful box, but most of them are just a fast track to a wasted afternoon. If you want to actually produce something that doesn’t look like a cloudy mess, you need to prioritize the boring stuff. Start with a high-quality digital scale. Forget using measuring cups; getting your resin mixing ratios explained through volume is a recipe for a sticky, uncured disaster. Precision is the difference between a professional finish and a project that stays tacky forever.
Next, let’s talk about your lungs and skin. I’ve seen too many people treat this like a casual hobby, but you need to take safety precautions for epoxy resin seriously. A decent respirator with organic vapor cartridges isn’t an “extra”—it’s non-negotiable. Once you have the safety sorted, invest in silicone molds that are thick and durable. Cheap, flimsy plastic molds will warp under the heat of the chemical reaction, ruining your geometry. Buy tools that solve problems, not just things that look good on a shelf.
Safety Precautions for Epoxy Resin You Cant Ignore
Look, I’ve spent enough time in workshops to know that you can’t fix a ruined pair of lungs with a quick patch job. When people start getting into this hobby, they often treat the chemical side of things like an afterthought, but you need to treat epoxy with the same respect you’d give a high-voltage circuit. Most of the “aesthetic” setups you see online forget the most important part: ventilation. Don’t just open a window and hope for the best; if you aren’t working in a space with active airflow or a dedicated respirator, you’re asking for trouble.
Beyond the breathing part, you need to be smart about your skin and eyes. I’ve seen too many people try to work with bare hands because they want to “feel” the texture, but those chemicals don’t care about your comfort. Invest in a decent pair of nitrile gloves and keep them on until the job is done. Also, don’t get lazy with your safety precautions for epoxy resin by skipping the eye protection. A single splash during a heavy pour can turn a fun afternoon into a permanent medical issue. It’s not about being paranoid; it’s about making sure you’re actually around to enjoy the finished piece.
Three Real-World Rules to Save You Time and Money
- Stop obsessing over the colors and start obsessing over the temperature. Resin is a chemical reaction, not magic; if your workspace is too cold, it’ll stay tacky forever, and if it’s too hot, it’ll bubble up and ruin your entire batch. Find a steady, climate-controlled spot and stick to it.
- Don’t trust the “easy” mixing instructions on the cheap bottles. I’ve seen too many beginners end up with a sticky, half-cured mess because they rushed the stir. Scrape the sides, hit the bottom of the cup, and mix it like you’re trying to emulsify a difficult sauce—patience here prevents a very expensive trip to the trash can.
- Level your workspace before you even touch the resin. It sounds basic, but even a slight tilt in your workbench will turn a perfectly poured coaster into a lopsided mess. Use a bubble level, not your “gut feeling,” because gravity doesn’t care about your creative vision.
The Bottom Line
Stop chasing the “aesthetic” starter kits you see on social media; invest your money in high-quality safety gear and precision measuring tools first, because a ruined project is a nuisance, but a lung irritation is a permanent setback.
Precision is everything in this process—treat your resin mixing like a systems engineering problem where the ratios must be exact, or the entire batch is nothing more than expensive, sticky waste.
Cutting Through the Mess
At the end of the day, resin isn’t about chasing a specific aesthetic you saw on a curated feed. It’s about understanding the chemistry, respecting the safety protocols, and investing in the right tools rather than the cheapest ones. If you’ve got your respirator ready, your measurements dialed in, and a workspace that isn’t a total disaster, you’ve already bypassed the biggest hurdles most beginners trip over. Don’t let a single failed pour or a stubborn air bubble derail your progress; even in systems engineering, the first prototype rarely runs perfectly. Just focus on the fundamentals of the process and let the rest fall into place.
My advice? Stop overthinking the “perfect” project and just start making something. You’re going to waste some resin, and you’ll probably make a mess, but that’s just part of the calibration period. Real skill comes from the repetition of the work, not from reading another guide. Build something that actually holds up, something you’re proud to show off, and most importantly, something that was built to last. Now, get to it.
