

You don’t need a thousand-dollar wood-fired oven or a specialized Italian flour to get a decent crust in your kitchen. Most of the “pro” tutorials online make it look like you need a degree in chemistry and a suite of expensive gadgets just to get started, but that’s mostly just marketing noise. I spent years thinking I couldn’t master how to make homemade pizza until I realized that a standard home oven and a heavy baking stone are more than enough if you actually understand the mechanics of heat and hydration.
I’m not here to sell you on some over-complicated, twenty-step sourdough process that requires a PhD. Instead, I’m going to show you a reliable, repeatable workflow that works every single time, regardless of your kitchen setup. We’re going to focus on the fundamental variables—the dough, the heat, and the timing—so you can stop guessing and start eating. Let’s get to work and build a process that actually delivers.
Recipe Details
Ingredients
- 250g all-purpose flour
- 150ml warm water
- 7g active dry yeast
- 1 tsp sugar
- 1 tsp salt
- 1/2 cup tomato sauce
- 1.5 cups shredded mozzarella cheese
- 4 slices pepperoni
Recipe Instructions
Step 1
Start with the dough, but don’t overcomplicate it. You don’t need a high-tech mixer; a large bowl and some decent muscle will do just fine. Mix your flour, water, yeast, and a pinch of salt until it forms a shaggy mass, then let it sit. The real work happens during the knead—you’re looking for a texture that feels supple and elastic, not sticky or stubborn. Once it’s smooth, tuck it into a bowl, cover it, and let it rise in a warm spot until it’s actually doubled in size.
Step 2
While the dough is doing its thing, focus on the sauce. Most people make the mistake of buying a jar of pre-made stuff that tastes like pure sugar and preservatives. Instead, grab a can of high-quality crushed tomatoes and add a splash of olive oil, a clove of smashed garlic, and a pinch of salt. That’s it. You want the natural acidity of the tomato to shine through, not a cocktail of dried herbs that’s been sitting in a pantry for three years.
Step 3
Get your oven as hot as it will go. If you have a pizza stone, put it in now; if not, a heavy baking sheet flipped upside down works just as well. You want that surface to be radiating heat before the dough ever touches it. Preheating is the one part of this process where you can’t cut corners—if the oven isn’t screaming hot, you’ll end up with a soggy, cracker-like crust instead of a crisp foundation.
Step 4
Now, time to assemble. Don’t use a rolling pin; you’ll squeeze all the air out of the dough and end up with something dense and unappealing. Use your hands to stretch the dough out on a piece of parchment paper. Spread a thin layer of that sauce, add your cheese—fresh mozzarella is worth the extra buck—and whatever toppings you actually like. Keep it relatively light on the toppings; if you pile it too high, the weight will prevent the crust from cooking through properly.
Step 5
Slide the pizza into the oven and watch it like a hawk. Depending on your oven’s temperament, this could take anywhere from five to ten minutes. You’re looking for the cheese to be bubbling and the edges of the crust to show some deep, golden-brown char. Once it looks right, pull it out, let it sit for a minute so the cheese sets, and then slice it up. It’s simple, it’s efficient, and it beats any delivery driver every single time.
Finding the Best Pizza Dough Recipe That Actually Works
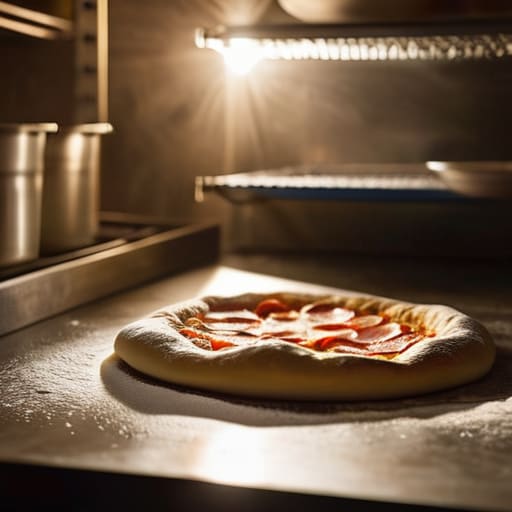
Look, you can find a thousand different versions of the “perfect” dough online, but most of them are over-engineered. You don’t need a PhD in chemistry to get a decent result; you just need to understand that time is your most important ingredient. If you want to move beyond mediocre bread and into something resembling a real crust, stop rushing the process. I’ve found that the real secret lies in yeast dough fermentation tips—specifically, letting your dough sit in the fridge for twenty-four to forty-eight hours. That slow cold ferment develops a depth of flavor that a quick, same-day rise simply can’t touch.
Once you’ve nailed the base, don’t go overboard with the extras. I see people loading up on twenty different toppings, which just turns your pizza into a soggy mess. If you’re baking pizza in a home oven, keep it simple so the heat can actually do its job. A high-quality flour, water, salt, and yeast will get you 90% of the way there. The rest is just about managing your heat and your patience.
Essential Yeast Dough Fermentation Tips for Consistent Results
Most people treat dough like a timer on a microwave—you set it, and you expect it to be done in exactly sixty minutes. That’s a mistake. If you want to master yeast dough fermentation tips, you have to stop watching the clock and start watching the dough. Temperature is your primary variable here. If your kitchen is cold, the process slows down; if it’s warm, things can get out of hand quickly. I’ve found that a slow, cold ferment in the fridge overnight is the real secret to developing that complex, sourdough-adjacent flavor without needing a degree in microbiology.
Consistency is what separates a mediocre crust from something worth eating. When you’re baking pizza in a home oven, you’re already fighting a battle against lower temperatures compared to a commercial deck oven. You can help yourself by ensuring your fermentation doesn’t over-proof. If the dough becomes too bubbly and weak, it won’t hold its structure when you stretch it, leading to a limp center. Aim for a dough that feels resilient and aerated, not fragile. Control your environment, respect the biology, and the results will follow.
Stop Overcomplicating the Setup: Three Practical Rules
- Stop obsessing over high-tech infrared thermometers. If your oven isn’t screaming hot and your stone isn’t radiating heat like a furnace, your crust will be gummy. Just preheat it for at least an hour and trust the thermal mass.
- Use better flour, but keep it simple. You don’t need some obscure, overpriced import; just find a decent high-protein bread flour. It gives you the structural integrity you need to handle the toppings without the dough turning into a wet mess.
- Manage your moisture like a systems engineer. If you’re using fresh mozzarella, slice it and let it drain on a paper towel for thirty minutes before it touches the dough. I’ve seen too many “gourmet” pizzas turn into a soup because someone didn’t account for water content.
The Bottom Line
Stop chasing perfection and start focusing on your environment; temperature and timing matter more than any expensive specialized gear.
Consistency is built through repetition, so don’t get discouraged if your first few crusts aren’t textbook—just keep refining your process.
Cutting Through the Flour Dust
At the end of the day, making great pizza isn’t about owning a thousand-dollar wood-fired oven or sourcing flour from a specific hillside in Italy. It comes down to the fundamentals we’ve talked about: a reliable dough recipe, patience during the fermentation process, and a heat source that actually holds its temperature. If you get the core mechanics right—the hydration, the yeast activity, and the heat—the rest is just noise. Don’t let the perfectionists on social media convince you that you need more gear to get a decent crust.
My advice? Stop overthinking the variables and just start building your workflow. You’re going to mess up a few batches, and honestly, that’s part of the system. You’ll learn more from a burnt crust than a dozen YouTube tutorials. Once you master the basics, you won’t just be making food; you’ll be running a kitchen that functions exactly how you want it to. Now, grab your peel and get to work.
