
I once spent a whole Saturday trying to refresh an old metal filing cabinet, only to end up with a finish that looked like an orange peel had exploded all over it. I followed the instructions on the can to a T, but I learned the hard way that most tutorials skip the most important part: the prep work. If you’re looking for a magic wand in a can, you’re going to be disappointed, because learning how to spray paint isn’t about the spray itself—it’s about the discipline you put in before you ever pull that trigger.
I’m not here to sell you on some fancy, expensive setup or a dozen specialized gadgets you don’t need. I want to show you how to get a professional-grade finish using basic tools and a bit of common sense. We’re going to strip away the fluff and focus on the actual mechanics of coverage, temperature, and surface tension. By the time we’re done, you’ll know exactly how to tackle your next project without wasting a single dime on re-doing the job.
Guide Overview
Tools & Supplies
- Spray paint cans (various colors needed)
- Masking tape (to protect surrounding areas)
- Drop cloth (to catch overspray)
- Sandpaper (to smooth surface before painting)
- Surface cleaner (1 bottle/can)
- Primer (1-2 cans depending on surface size)
- Protective mask (1 unit)
Step-by-Step Instructions
- 1. First, you need to clean the surface. I’ve seen too many people just start spraying over layers of old grease, dust, or wax, and it’s a recipe for disaster. Grab some degreaser or even just warm, soapy water and get that item completely spotless. If there’s any residue left, the paint won’t bond, and you’ll be scraping it off in a week.
- 2. Next, tackle the prep work by masking everything off. This is the part most people try to skip because it’s tedious, but it’s the difference between a professional look and a mess. Use high-quality painter’s tape and some newspaper or plastic sheeting to cover anything you don’t want coated in pigment. If you’re working on something with tight crevices, take your time—precision here saves hours of cleanup later.
- 3. Once you’re taped up, give the surface a light sanding. You aren’t trying to strip it down to the bare metal or wood, but you do want to scuff up the existing finish so the new layer has something to “bite” into. A medium-grit sandpaper works best for this. After you’re done, wipe away every single speck of sanding dust with a tack cloth or a damp rag.
- 4. Now, get your spray cans ready and find a workspace with decent airflow. Don’t try to do this in a cramped, unventilated corner. Shake the can for at least a full minute—I’m talking a solid sixty seconds—to ensure the pigments and solvents are properly mixed. If you don’t, you’ll end up with a finish that looks blotchy and uneven.
- 5. Start applying the paint in thin, even coats. This is the golden rule: never try to cover everything in one go. Hold the can about 8 to 12 inches away and move in steady, sweeping motions, starting the spray just before you hit the object and ending it just after you pass it. If you linger too long in one spot, you’ll get drips, and drips are a nightmare to fix.
- 6. Wait between coats. Depending on the temperature and humidity, you’ll likely need anywhere from 15 to 30 minutes between layers. It’s tempting to keep spraying until it looks “done,” but patience is what prevents the paint from bubbling or running. You want to build up the color slowly and deliberately.
- 7. Finally, let it cure. There is a massive difference between “dry to the touch” and “fully cured.” Even if it looks fine after an hour, give it at least 24 hours—ideally longer if you’re painting something that’s going to see heavy use—before you start handling it or putting it back into service. If you rush this, you’ll leave permanent fingerprints in the finish.
Mastering Spray Paint Surface Preparation for Lasting Results
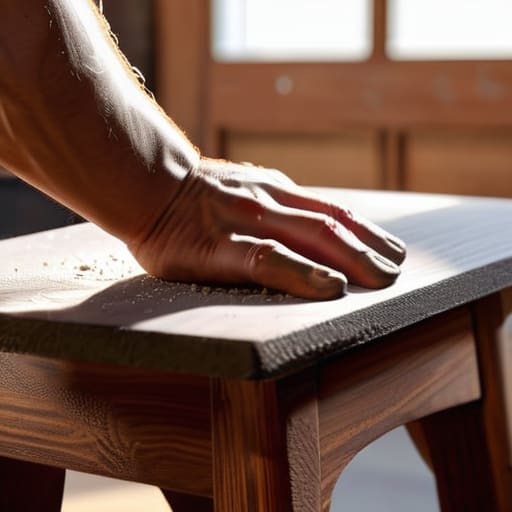
Look, if you skip the prep work, you’re just painting over a disaster waiting to happen. I’ve spent too many weekends scraping flakes of cheap paint off a chair because I was too impatient to sand it down properly. Real spray paint surface preparation isn’t just about making things look clean; it’s about creating a mechanical bond so the finish actually sticks. If there’s even a trace of grease, wax, or old oil on that surface, the paint is going to bead up or peel within a month. Get a degreaser, scrub it down, and don’t stop until you’re sure it’s surgically clean.
Once you’ve cleaned it, don’t even think about reaching for the color can yet. You need to be applying primer before spray paint if you want any hope of a professional-grade finish. Primer fills those microscopic pores and gives the topcoat something to bite into. While you’re at it, keep an eye on your environment. If it’s too humid or too cold, your spray paint drying time is going to double, and you’ll end up with a tacky, dust-magnet mess. Patience is a tool, just like a good wrench—use it.
Preventing Spray Paint Drips and Avoiding Costly Mistakes
The biggest mistake I see people make isn’t the paint itself; it’s the impatience. You’ll be tempted to lay it on thick to get coverage faster, but that’s exactly how you end up with those ugly, sagging runs that ruin a perfectly good project. Preventing spray paint drips comes down to one simple rule: multiple thin coats are always better than one heavy one. If you think you’ve applied enough, you’re probably halfway there. Wait for the proper spray paint drying time between layers so the previous coat is stable enough to handle the next pass.
While you’re at it, don’t overlook the environment you’re working in. If it’s too humid or there’s a heavy breeze, you’re fighting a losing battle against uneven application and debris. I also can’t stress enough that you need to keep your distance—usually about 6 to 10 inches—and keep the can moving in a steady, sweeping motion. If you pause in one spot, even for a heartbeat, you’ve just created a mess you’ll be sanding down for the next hour. Stay consistent, stay moving, and let the chemistry do the work.
Three Things Most People Get Wrong (And How to Fix Them)
- Stop treating the nozzle like a trigger on a garden hose. You aren’t trying to soak the object; you’re trying to mist it. Start your spray about six inches away, sweep across the surface in a steady motion, and only let go of the trigger once you’ve passed the edge of the piece. If you start or stop your spray directly on the item, you’re just asking for a puddle.
- Forget the “one and done” mentality. I see people try to cover a dark surface with a single, heavy coat of light paint, and it ends up looking like a textured mess. It’s much better to lay down three or four thin, translucent coats. It takes a bit more patience, but it’s the only way to get a professional finish without the runs.
- Check your environment before you even crack the can. If it’s too humid or if there’s a heavy breeze, your paint job is going to be a disaster. High humidity prevents the solvents from evaporating correctly, leaving you with a tacky, dull finish. Find a dry, still spot—ideally a garage or a shaded outdoor area—where the air isn’t working against you.
The Bottom Line
Don’t cheat on the prep work; if the surface isn’t clean and smooth before you even touch the trigger, you’re just painting over a disaster that’ll flake off in a month.
Patience beats speed every single time—take multiple thin, light coats rather than trying to cover everything in one heavy, dripping pass.
Final Thoughts Before You Pull the Trigger
At the end of the day, spray painting isn’t about magic; it’s about the discipline of the process. If you took the time to sand that surface down properly and didn’t rush those initial light coats, you’ve already done the hard part. Remember, the difference between a professional-looking finish and a sticky, dripping mess usually comes down to patience and preparation. Don’t let the urge to finish quickly override the mechanics of the job. If you respect the drying times and keep your distance, the results will speak for themselves.
Don’t get discouraged if your first attempt isn’t museum-quality. I’ve spent years fixing mistakes in both systems engineering and home renos, and I can tell you that experience is the only real shortcut. Every drip you clean up and every missed spot you catch is just data for your next project. Grab your mask, check the wind direction, and just get to work. You’re building something that lasts, and that’s worth the extra effort.
