
I was halfway through a weekend project in my workshop when I caught sight of that one jagged dent in the hallway—the one I’ve been ignoring for three months. We’ve all been there, staring at a blemish and thinking it’s going to require a professional contractor or a massive trip to the hardware store. But here’s the truth: most people overcomplicate how to patch a hole in the wall by buying way too much gear they don’t need. You don’t need a specialized toolkit or a degree in construction; you just need to stop overthinking the physics of a bit of drywall and get to work.
In this guide, I’m stripping away the fluff and giving you a straightforward, systems-based approach to getting a seamless finish. I’ll show you exactly which materials actually hold up over time and the specific sequence you need to follow so you aren’t stuck sanding for hours. My goal is to help you fix the damage permanently so you can stop looking at that eyesore and get back to your actual life.
Guide Overview
Tools & Supplies
- Putty knife for applying compound
- Sanding block for smoothing surfaces
- Spackle knife for small repairs
- Sponge for cleaning dust
- Spackle or joint compound (1 small tub)
- Wall patch or mesh tape (1 roll)
- Sandpaper (medium and fine grit)
- Interior paint (1 small sample pot)
Step-by-Step Instructions
- 1. First, you need to assess the damage. If it’s just a tiny puncture from a nail, you’re in luck. But if you’re looking at a gaping hole where a door handle decided to make contact, you can’t just slap some putty on it and hope for the best. For anything larger than a dime, you’re going to need a mesh patch kit or a piece of scrap drywall to give the structure some integrity.
- 2. Clean up the perimeter. I’ve seen people try to patch over loose flakes of old paint or crumbling plaster, and that is a recipe for a failed repair. Take a utility knife or a piece of sandpaper and trim away any jagged edges or debris around the hole. You want a clean, stable surface so the new material actually has something to bite into.
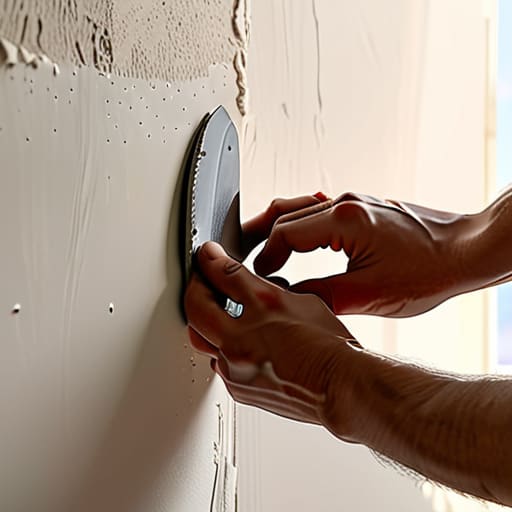
- 3. Apply your patch. If you’re dealing with a small divot, just grab your lightweight spackle and a putty knife. If it’s a larger hole, center your mesh patch over the gap and make sure it’s sitting flush. When you apply the first layer of compound, don’t try to be a hero and fill the whole thing at once; aim for a thin, even coat that covers the patch completely.
- 4. Let it dry, then sand. This is where most people get impatient and rush the process. You have to wait until the compound is completely hard—usually a few hours, but sometimes overnight depending on the humidity. Once it’s dry, use a fine-grit sanding sponge to level it out. Your goal isn’t just to make it flat, but to make it seamless with the rest of the wall.
- 5. The second coat (if needed). If you look at the patch and see any valleys or dips, don’t panic. Just apply a second, slightly wider layer of compound to feather the edges out. This “feathering” technique is what prevents that annoying, raised bump from showing up under your paint later. It’s all about the gradual transition from the patch to the wall.
- 6. Prime it before you paint. This is the step everyone skips, and it’s exactly why their repairs look like a different color than the rest of the room. Drywall compound is incredibly thirsty; if you don’t use a primer, the wall will suck the moisture out of your paint unevenly, leaving you with a dull, matte spot that screams “I patched this.
- 7. Final paint application. Once the primer is set, grab a small roller rather than a brush if you can. A roller helps mimic the natural texture of the existing wall, which helps the repair disappear into the background. Apply your color in thin layers, and once you’re done, step back and look at it from an angle. If you can’t see the repair, you’ve done the job right.
Choosing a Drywall Patch Kit for Small Holes or Better
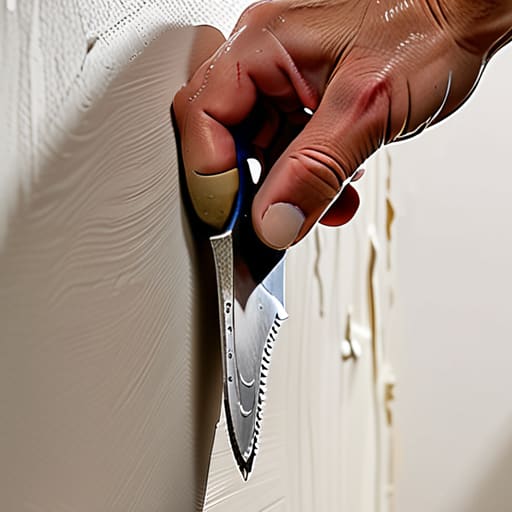
Look, you can head to the hardware store and grab whatever looks cheapest, but if you want to avoid doing this job twice, you need to pick the right gear. If you’re dealing with something minor—like a door handle ding or a stray nail hole—a standard drywall patch kit for small holes is usually your best bet. These kits are convenient because they bundle the essentials, but don’t just grab the first one you see. Look for a kit that includes a decent quality spreader; a cheap, flimsy plastic tool is going to make your spackling compound application a nightmare of uneven ridges.
If the damage is a bit more substantial, or if you’re dealing with older, crumbly surfaces like fixing holes in plaster walls, skip the tiny kits and go for the heavy hitters. You’ll want a roll of wall repair mesh tape and a tub of setting-type joint compound. The mesh provides the structural integrity that a quick-fix patch lacks, ensuring the repair doesn’t just crack and fall out the next time someone bumps the wall. It’s about building a foundation that actually lasts.
Mastering Spackling Compound Application for a Seamless Finish
Once you’ve got your patch or mesh in place, the real work begins with the spackling compound application. Most people make the mistake of trying to do it all in one thick, heavy layer. That’s a recipe for disaster; you’ll end up with a mound that takes forever to dry and is a nightmare to level out. Instead, I find it’s much more efficient to work in thin, translucent layers. Think of it like applying primer—you want to fill the void and smooth the edges, not build a mountain.
When you’re spreading the compound, use your putty knife to pull the material slightly beyond the edges of the hole. This helps feather the edges into the surrounding wall so the repair doesn’t look like a raised bump. If you’re dealing with older homes, you might find yourself fixing holes in plaster walls, which requires an even lighter touch since plaster is less forgiving than modern drywall. Once it’s bone dry, your focus shifts to how to sand drywall smooth. Don’t go overboard with the sandpaper; just use a fine-grit block to knock down the ridges until you can run your hand over it without feeling a transition.
Three Things Most People Mess Up (And How to Avoid Them)
- Don’t be lazy with the sanding. I’ve seen plenty of guys slap some compound on, sand it once, and call it a day, only to have a giant, ugly hump show up under the paint. Take your time. Sand in a circular motion and keep checking it with your hand; if you can feel a ridge, your eyes are going to see it later.
- Sanding creates a mess that’ll get into everything from your keyboard to your lungs, so don’t skip the prep. Grab a cheap plastic drop cloth or even just some old newspaper to cover the floor, and if you’re working indoors, keep a vacuum nearby. It’s much easier to clean up a pile of dust than it is to scrub drywall grit out of your carpet.
- Stop trying to fix everything in one go. If you’re dealing with a hole deeper than a nail prick, you’re going to need multiple thin layers. If you try to fill a deep void with one massive glob of spackle, it’s going to crack as it dries, and you’ll be right back where you started. Do a thin layer, let it set, then go back for the finish.
The Bottom Line
Don’t rush the drying process; applying multiple thin layers of spackle is always going to look better and last longer than trying to kill a deep hole with one massive, messy glob.
Invest in a decent sanding block rather than just using your hand; a level surface is the difference between a professional fix and a patch that catches the light every time you walk by.
Done and Dusted
At the end of the day, fixing a hole in the wall isn’t about achieving architectural perfection; it’s about eliminating the distraction. You’ve picked the right patch, applied the compound without overdoing it, and sanded it down until it’s flush. If you followed the steps, you haven’t just covered a dent—you’ve restored the structural integrity of the room. Remember, the secret to a professional look isn’t some expensive magic product, but rather the patience to let things dry properly before you even think about touching them with sandpaper.
Don’t let a small imperfection like this make you feel like your home is falling apart. Most of the “chaos” we deal with in our living spaces is just a series of small, manageable repairs waiting to happen. Once you get comfortable with these basics, you’ll realize that maintaining your environment is a lot like managing a workflow: focus on the fundamentals, use the right tools for the job, and keep moving forward. Now, grab a brush, hit that spot with some paint, and get back to enjoying your space.
