
I spent three weeks following a “beginner-friendly” tutorial that promised artisanal, lavender-scented perfection, only to end up with a batch of soap that felt like a bar of industrial grease and smelled like a chemical spill. Most people think learning how to make soap requires a boutique setup and a cabinet full of expensive, essential oils that do more for your Instagram feed than your skin. The truth is, if you aren’t focused on the chemistry of the lye-to-oil ratio, you aren’t making soap; you’re just making a mess that’s going to irritate your hands.
I’m not here to sell you on a lifestyle or a specific aesthetic. In this guide, I’m going to show you how to strip away the fluff and focus on the repeatable process that actually works. We’re going to cover the essential gear you need, the safety protocols that aren’t optional, and the precise mechanics of the saponification process. By the time we’re done, you’ll know how to produce a clean, functional bar of soap using reliable methods that don’t rely on hype.
Guide Overview
Tools & Supplies
- Digital scale for precise measurements
- Stick blender for emulsifying oils and lye
- Stainless steel pot for melting oils
- Heat-resistant plastic or glass containers for lye solution
- Silicone molds for shaping the soap
- Coconut oil (approx. 500g)
- Olive oil (approx. 500g)
- Sodium hydroxide/Lye (approx. 150g)
- Distilled water (approx. 350g)
- Essential oils (30-50ml)
Step-by-Step Instructions
- 1. First, you need to set up your workspace like a proper lab, not a kitchen counter. Lye is no joke—it’s caustic and it doesn’t care about your feelings. Clear a large, non-porous surface, grab some heavy-duty nitrile gloves, and get your safety goggles on before you even touch a single ingredient. If you aren’t wearing protection, you aren’t making soap; you’re just playing with fire.
- 2. Get your measurements dead on using a digital scale. Forget measuring by volume with measuring cups; that’s how you end up with a batch that’s either too oily or too harsh. Weigh out your distilled water and your sodium hydroxide (lye) separately. When you mix them, always add the lye to the water, never the other way around. If you do it in reverse, you risk a chemical reaction that can literally spray lye out of the container.
- 3. While your lye-water solution is cooling down, weigh out your oils. For a reliable, functional bar, I usually stick to a base of olive oil for conditioning and coconut oil for that much-needed hardness and lather. Get your oils in a stainless steel pot and gently heat them until they’re around 100°F. You want your lye solution and your oils to be within a similar temperature range—ideally between 90°F and 110°F—before you attempt to combine them.
- 4. Once the temperatures are dialed in, slowly pour the lye solution into the oils. Grab a stick blender—don’t even try to do this by hand unless you have all afternoon—and pulse it in short bursts. You’re looking for “trace,” which is that specific moment when the mixture reaches the consistency of thin pudding. If you lift the blender and the drips stay on the surface for a second before sinking, you’ve hit the mark.
- 5. Now, pour that mixture into a silicone mold. I prefer silicone because it’s easy to work with and won’t crack under thermal stress like some cheap wood molds might. Tap the mold firmly on the counter a few times to force out any air bubbles trapped in the corners. Once it’s poured, cover it with a piece of cardboard and a towel to keep the heat in; this helps the saponification process finish its work undisturbed.
- 6. Leave it alone for at least 24 to 48 hours. I know it’s tempting to peel it out and see if it worked, but patience is a tool just like any other. Once it’s firm to the touch, pop it out of the mold and slice it into bars using a sharp knife or a dedicated soap cutter. If the edges are a bit uneven, don’t sweat it; you can always plane them down later.
- 7. The final, most critical step is the cure. Set your bars on a drying rack in a well-ventilated area and leave them for four to six weeks. This isn’t just about waiting; it’s about letting the water evaporate so the bar becomes hard, long-lasting, and much milder on your skin. If you use it too early, it’ll turn into a mushy mess in the soap dish, and you’ll have wasted all that effort.
Mastering Cold Process Soap Making Methods Without the Hype
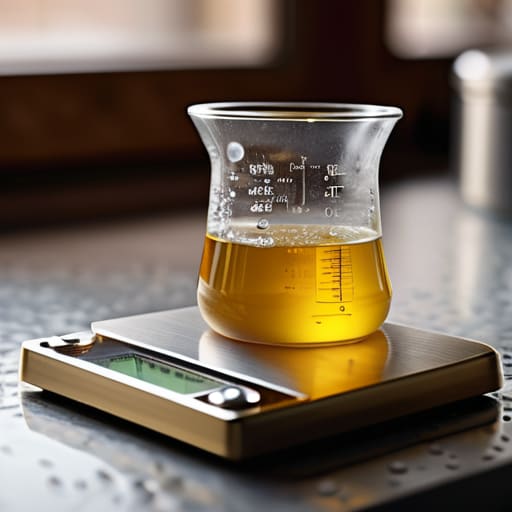
Look, you can spend hours watching those high-production tutorials where everything looks like a spa retreat, but real soapmaking is more about chemistry than aesthetics. If you want to move beyond the basics, you need to stop guessing and start calculating. I always tell people to invest in a reliable lye and oils ratio calculator before they even touch a beaker. If your math is off, you aren’t making soap; you’re making a skin irritant. Precision isn’t “boring”—it’s the difference between a bar that lasts three showers and one that turns into mush in a week.
Once you have the math down, don’t get distracted by the “natural” marketing fluff. People will try to sell you a dozen different essential oils for natural soap, claiming they’ll transform your life. Most of it is just expensive scent. Focus on the foundational stuff first: high-quality fats and consistent temperature control. If you’re looking for a shortcut, melt and pour soap techniques are fine for kids’ crafts, but if you want a bar that actually performs, stick to the cold process. It’s more work, but the results are built to last.
Precision Over Aesthetics Using a Lye and Oils Ratio Calculator
Look, I’ve seen enough “aesthetic” DIY videos to know that people love to skip the math in favor of the pretty colors. But here’s the reality: soap chemistry isn’t a suggestion, it’s a formula. If your math is off, you aren’t making a luxury bar; you’re making a caustic mess that’ll irritate your skin or a greasy brick that won’t lather. This is where a lye and oils ratio calculator becomes your most important piece of gear—more important than any fancy silicone mold you’ve seen on Instagram.
I treat my soap batches like I treat a systems engineering project: everything has to be accounted for before the first drop of water hits the lye. Don’t try to eyeball the measurements or rely on “vibes.” Use a reliable calculator to determine your superfat levels, which ensures you have enough extra oils to keep the bar moisturizing. Once you’ve dialed in the math, you can start thinking about adding essential oils for natural soap or adjusting your scent profiles. Get the chemistry right first; the art can come later.
Three ways to keep your soap from becoming a total mess
- Stop guessing with your measurements. If you aren’t using a digital scale that measures to the tenth of a gram, don’t even bother starting. In soapmaking, “close enough” is how you end up with a batch that’s either a caustic hazard or a greasy, unusable brick.
- Respect the temperature window. I see people trying to force the process by heating everything to extremes, but you’re looking for a steady middle ground. Aim for your lye solution and your oils to be within about ten degrees of each other before you mix. It keeps the emulsion stable and prevents that frantic, unmanageable “seizing” that ruins a good batch.
- Invest in real gear, not “crafty” substitutes. You don’t need a kitchen full of expensive gadgets, but you do need dedicated stainless steel or heavy-duty plastic tools that you won’t use for cooking ever again. Using a cheap, flimsy whisk or a wooden spoon that’s going to soak up lye is a shortcut to a headache you don’t want.
The Bottom Line on Reliable Soapmaking
Stop chasing the “aesthetic” of soapmaking and start prioritizing your chemistry; if your lye-to-oil ratio is off, no amount of expensive fragrance or pretty molds will save a batch that’s unsafe or structurally unsound.
Invest in repeatable precision rather than trendy gear—a reliable digital scale and a solid calculator are the only tools that actually matter when you’re trying to build a process that works every single time.
Getting the Job Done
At the end of the day, soapmaking isn’t about chasing some Pinterest-perfect aesthetic or buying every expensive additive on the market. It comes down to the fundamentals: respect the chemistry, get your lye-to-oil ratios dead on, and don’t skip the precision work. If you’ve mastered the cold process method and you’re using a reliable calculator, you’ve already bypassed the biggest pitfalls that trip up most beginners. Focus on the repeatable process rather than the flashy decorations, and you’ll end up with a product that actually cleans without irritating your skin.
Don’t let a small mistake or a slightly uneven batch discourage you. Even in systems engineering, things rarely work perfectly on the first run; you just iterate and refine. Once you get the hang of the variables, you’ll stop worrying about the hype and start enjoying the actual utility of what you’ve built. There is a quiet, steady satisfaction in knowing exactly what is in the soap you use every morning. Now, stop reading, clear your workspace, and go get your hands dirty.
