
I was staring at a half-finished backsplash in my guest bath last weekend, surrounded by empty tubes and a pile of messy, uneven smears that looked more like a crime scene than a renovation. Most people think learning how to caulk is about buying the most expensive, high-tech sealant on the shelf, but that’s a lie. The truth is, the gear matters far less than your technique and patience. I’ve spent enough time fixing botched DIY jobs to know that a $5 tube of silicone and a steady hand will beat a $25 premium brand used poorly every single time.
In this guide, I’m cutting through the jargon to show you how to actually get a clean, professional bead without the headache. We’re going to skip the fluff and focus on the essential mechanics: prepping the surface, controlling the flow, and the one trick I use to smooth everything out perfectly. If you want to stop patching leaks every six months and finally do the job once, let’s get to work.
Guide Overview
Tools & Supplies
- Caulking gun to apply the sealant
- Putty knife or scraper to remove old caulk
- Caulk finishing tool or wet finger to smooth the bead
- Caulk tube (silicone or acrylic depending on surface)
- Painter's tape to create clean lines
- Rubbing alcohol or cleaner to prep the surface
Step-by-Step Instructions
- 1. First, you need to clear the deck. If there’s old, crusty caulk sitting in that gap, you can’t just smear new stuff over it and hope for the best; it’ll peel off in a month. Grab a utility knife or a specialized caulk removal tool and scrape it all out until you’re down to the bare substrate. If you’re working in a bathroom, take your time so you don’t scratch the tub or the tile.
- 2. Once the old stuff is gone, clean the area like your life depends on it. Use a vacuum to suck up the debris, then wipe the joint down with a bit of isopropyl alcohol or a mild degreaser. Any lingering dust or soap scum will act like a barrier, and if the surface isn’t perfectly clean, the new bead won’t bond, and you’ll be doing this whole job again in six months.
- 3. Now, let’s talk about the tube. Don’t just jam it into the gun and start squeezing. Cut the tip of the nozzle at a 45-degree angle, and keep that opening small—about the width of the gap you’re trying to fill. If you cut it too wide, you’re going to end up with a massive, messy glob that looks like a mistake rather than a professional seal.
- 4. When you start applying, work with a steady, consistent pressure. Hold the gun at that same 45-degree angle and move it at a constant speed along the joint. It’s tempting to rush, but if you hesitate or change your rhythm, you’ll get lumps. Think of it like a steady stream of water; you want a smooth, continuous bead that fills the void completely.
- 5. This is where most people fail: the smoothing process. Don’t try to do it all with a dry finger. Fill a small container with water and a generous squirt of dish soap. Dip your finger in the suds and lightly run it along the bead to level it out. The soap prevents the caulk from sticking to your skin and helps you create a clean, concave shape that looks professional.
- 6. Finally, resist the urge to touch it. Once you’ve smoothed the bead, step back and leave it alone. Most silicone-based sealants need at least 24 hours to fully cure before they can handle moisture. If you try to use that shower too early, you’ve just wasted your time and your materials. Just let it set and do something else.
Mastering Caulk Gun Usage and Choosing Silicone vs Acrylic Caulk
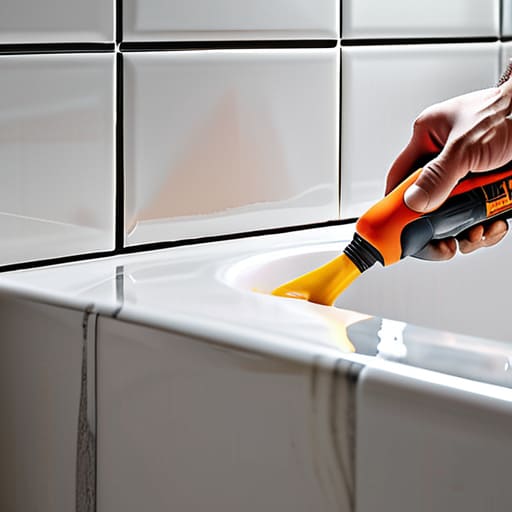
Before you even squeeze the trigger, you need to pick the right material, or you’ll be redoing this work in six months. When it comes to silicone vs acrylic caulk, the choice is usually dictated by where the moisture is. If you’re caulking bathtub seams or anything that sits in standing water, use 100% silicone. It’s waterproof and flexible, though it’s a pain to clean up if you mess up. Acrylic is fine for dry areas like caulking window frames, but it’ll crack and peel if it gets soaked.
As for caulk gun usage, don’t just mash the trigger like you’re trying to force a jammed printer. You want a steady, controlled pressure. A common mistake is pulling the gun away from the joint as you go; instead, keep the nozzle tucked tight against the gap and move at a constant pace. If you find yourself struggling to get a clean line, don’t sweat it—the secret to smoothing a caulk bead isn’t a magic hand, it’s a wet finger or a specialized tool. Just keep it light and consistent.
Removing Old Caulk Before You Start the New Seal
Look, if you try to layer new sealant over the old junk, you’re just setting yourself up for a mess. It won’t bond, it’ll look terrible, and you’ll be doing this whole job again in six months. Removing old caulk is the most tedious part of the process, but it’s where most people cut corners and fail. I usually grab a sharp utility knife or a dedicated caulk removal tool to slice along the edges of the joint. Be careful not to gouge the actual surface of your tub or tile; you want to peel the bead away, not damage the substrate.
Once you’ve scraped out the bulk of it, you’re going to find those stubborn little bits of residue left behind. This is where most DIYers get frustrated and quit. Don’t just ignore them. Grab a rag soaked in mineral spirits or a specialized cleaner to wipe the area down until it’s truly bare. If you’re caulking bathtub seams, getting that surface pristine is the only way to ensure the new bead actually sticks. A clean surface is the difference between a professional-grade seal and a leaky disaster.
Three Ways to Avoid a Messy Finish
- Clean the surface like your life depends on it. If there’s even a trace of dust, soap scum, or old residue left behind, that new bead of caulk isn’t going to bond—it’s just going to peel off in a week. Use a bit of rubbing alcohol on a rag to wipe the area down right before you start.
- Don’t try to be a hero with the gun. Most people squeeze too hard and end up with a massive, uneven glob. Keep a steady, light pressure on the trigger and move at a consistent pace. It’s better to do a thin, controlled bead and smooth it out than to try and fix a giant mess later.
- Use the finger-dip trick, but keep it clean. Once you’ve laid your bead, dip your finger in a mixture of water and a tiny drop of dish soap, then lightly run it along the joint to smooth it out. It prevents the caulk from sticking to your skin and gives you that professional, concave shape that actually sheds water.
The Bottom Line
Don’t cut corners on the prep work; if you try to layer new caulk over old, peeling mess, it’s going to fail, and you’ll just be doing the same job twice.
Pick the right material for the environment—use silicone for anywhere water touches, and save the acrylic for dry spots where you might need to paint later.
Getting the Job Done
At the end of the day, successful caulking isn’t about having the most expensive gear; it’s about the prep work and the patience to pull a steady bead. You’ve learned how to strip out the old, flaky mess, how to pick the right material for the environment, and how to actually control that caulk gun without making a disaster of your backsplash. If you focus on a clean surface and a consistent pressure, you’re already ahead of 90% of the DIYers I see making mistakes. It’s a simple process, but if you rush it, you’ll just be back here in six months scraping it all out again.
Don’t let a little mess or a few shaky lines discourage you. Home maintenance isn’t always glamorous, and it certainly isn’t always perfect on the first try. But there is a unique kind of satisfaction in looking at a sealed, watertight joint and knowing you did it yourself with your own two hands. Build things that actually last, and don’t be afraid to get your hands a little dirty to get there.
